Showing posts with label Vegetarian. Show all posts

Wednesday, February 1, 2012

Green Juice

Have you seen that documentary "Fat, Sick and Nearly Dead" ?  Well we did, and it really opened our eyes.  We knew the importance of eating real food, getting our fruits and veggies, and getting some exercise, but the journey and transformation these men experienced was amazing.  We followed it up with the documentary "Forks Over Knives"... part way through my husband said "I think I just became a raw vegan."  Alas, this hasn't totally happened, but we do eat more raw and cooked veggies and fruit and much less meat and animal products than we did before.  Both movies are amazing and well worth a watch!


Hence, we now have a Juicer and have incorporated it into our meal routine.  Our daughter walks over to the juicer, points at it and says "Daddy make me apple juice."  Our kids eat veggies regularly, but we've been working very hard to get them over the look of the "green" juice.  Carrot based juice was no problem... I guess orange is less scary than green.  


However, I think we've now succeeded.  This is Daisy well into her 4th cup of green juice.  (She's 2 and still a bit messy with drinks, I'm not trying to post inappropriate pictures here)


What you need:  a Juicer... or I hear that a Vitamix or another good blender can be used for juicing, but you may need to add some water and/or run through a strainer.  I've never done this, just providing options.


Ingredients: All ingredients assumed Organic, but buy what is available and right for your family.

1 pound baby spinach (run through juicer twice - optional)
  • Spinach and leafy greens can be a bit tricky.  We find that putting a handful into a tight ball then slowly pushing through the juicer works well.  We then pull out the remaining spinach from the clean bag we have in the discard bin, roll it into another tight ball and run through one more time... totally optional step
3 - 4 Apples (our favorite is Pacific Rose)
2 handfuls grapes
4 large peeled carrots
2 celery stalks


Juice and enjoy!


Remember to "Chew" your green juice before swallowing.  Don't laugh... stop laughing.  The chewing motion starts the digestion process via your salivary glands and the enzymes contained within your saliva.  Yes, you will feel a little weird, but you don't need to chew a lot, just until you taste the juice getting a little sweeter (what, our bodies are magic).  As a bonus, if you chew your juice, you are less likely to get an upset stomach from all the veggies you can squish into 1 delicious cup.  Many people who start juicing complain about stomach aches, and this is usually caused because they are relying on your stomach to do all the work without the saliva starting the process.

There are so many Green Juice recipes out there, I hope you like this one.

Sunday, January 22, 2012

Popcorn

Ok, don't laugh... but I've never made real popcorn until very recently.  However, I also never really eat popcorn, due to some jaw issues.  So I don't feel like my family has been overly contaminated by the magic created by 3 minutes in the microwave.


What you need:
1/2 cup popcorn kernels (I bought the organic from Trader Joes)
2 T Coconut Oil, room temperature
2 T Real Butter
Salt (Kosher or Sea)
Fresh Ground Pepper


How to prepare:
Follow instructions on back of bag :).  Kidding, however that is pretty much what I did.  I don't have a fancy air popper, so I made my popcorn on the stove in a Dutch Oven pot.

Place pot on stove, turn on burners so the pot can get hot.  Scoop 2 T..not overly heaping..of coconut oil into pan.  It should start to melt immediately.  You are looking for the bottom of your pan to be covered in a thin layer of oil.  If you are using a smaller or larger pan, you may need to adjust your amounts.  


Fresh Popped Popcorn
Add 3 to 4 kernels to pan and cover with lid.  Once they start to pop, add the rest of your kernels and replace lid.  Once you hear them popping, start shaking your pan (keep lid on) over the burner to help mix things up.  Continue doing this until your pan is full or you don't hear the frequent pop..pop..pop.


Melt approximately 2 T butter.  Pour over freshly popped corn, sprinkle with a salt and pepper, if you choose.  


Mix, Serve, Enjoy!


Zingy Quinoa

Because everything looks better in a martini glass....how about a delicious side of quinoa.


I'm not totally sure about the name of this one, but was trying to think of the two main experiences that come from this side dish.  The firm yet soft texture of the Quinoa (prounounced Keen-Wa) and the tangy zingy-ness of the vinegar.  If your not fond of the various vinegars, you can leave them out.  It tastes just fine with salt and pepper.  However, I seem to really like it... and prefer to have this mix on hand for a quick lunch or snack.  


You can make this recipe as big or small as you want.  Key things to remember, use double the liquid to Quinoa, so 1/2 cup Quinoa = 1 cup liquid.  Quinoa has no real flavor on its own, and can be quite bland, so that's where your preferred flavors come into play.  Salt and Pepper are your friends, as well as using a vegetable broth or chicken broth in place of water.  I'd suggest eye-balling the ratio of veggies you add, so they don't over take the dish.  I've provided measurements below, from one time when I really measured.  

What you need: (makes 6+ servings)
Also, I've picked veggies I like, you can change these to veggies you prefer.  However, I think the onion and red bell pepper really make the dish.


Quinoa Mix
Organic Bob's Red Mill Quinoa
2 cups vegetable broth
1 cup Quinoa, rinsed and dried (important step)
  • I think I prefer to buy the Bob's Red Mill that has already been rinsed and dried...if you want to trust labels.  I've bought from the bulk bin at Sprouts once... and have not totally figured out the most efficient way to drain these little guys.  Plus those aren't organic.
1 Red Bell Pepper, diced (approx 1+ cup)
1 Small Sweet Onion, diced (approx 1 cup)
1 cup Artichoke Hearts, quartered in oil, diced (Do Not Cook)
1 cup Mushrooms, diced or sliced
Rice Vinegar and/or White Wine Vinegar - to taste

Balsamic Vinegar (optional) - to taste
Extra Virgin Olive Oil (EVOO)


Salad Mix (if you want a salad)
Baby Spinach
1 Lemon
Kosher or sea salt
Pepper, freshly ground
Rice Vinegar and/or White Wine Vinegar

How to prepare Quinoa:
Prepare all veggies before starting quinoa...and keep separate


Quinoa: In a medium size pot, add broth and quinoa, cover on medium-high heat bring to boil.  Turn down to med-low and cook for 15 or so minutes until all liquid is absorbed and quinoa is a soft texture.  Stir occasionally.


Veggies: In a medium to large pan, heat to medium.  Add a pan swirl amount of EVOO, then your first veggie.  I find that I get a better caramelization and less soggy veggies if I cook each type separately and then combine together in a bowl as they are finished cooking.   Salt and pepper as you go... not adding till they are nearly finished cooking.  Remove to bowl.  Repeat for the veggies you have chosen.   Do not cook artichokes.


Combine: If all goes well, your veggies will finish cooking around the same time your qunioa is ready.  Add cooked veggies and diced artichokes to quinoa pan, mix well.  Now, get out your vinegars and give a few swirls around the mixture.  Sprinkle with Salt and Pepper, taste.  This portion is up to you.  I use more Rice Vinegar then Wine Vinegar.  I use the balsamic sparingly, but it adds a nice tint of color and sweetness.  If I was going to guess, maybe 1/4 cup total mix of Rice/White and 2 T Balsamic.  Continue tweaking till you like the flavor.  A little more salt may be needed to get the taste just right.


How to prepare Salad:
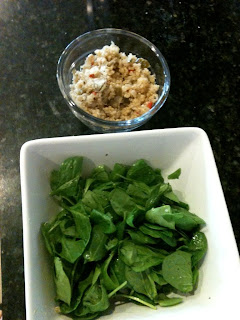
Add a few handfuls of baby spinach to a serving dish.  Slice the spinach beforehand, if you'd like.  Drizzle with a little white wine vinegar, squeeze some fresh lemon juice and sprinkle with salt and pepper.


Add Quinoa to the top and enjoy!
Another fun spin on this is to slice up some fresh avocado, squish it into the leaves, then add the quinoa on top.

Sorry if this was long... I can be over descriptive.  I hope you try this recipe and think it's as yummy as I do.

Cheers, Holly

Friday, January 20, 2012

Easy Corn on the Cob


Maybe all corn on the cob is easy to prepare, but I think this method of cooking is not only easy, but may be the best tasting corn on the cob around.

Need: Microwave and a microwaveable container with lid, large enough to hold cobs in husk
Ingredients: corn on the cob - in husk


To Cook: Trim up outside of husks so the cobs will fit into microwaveable container with lid on
Microwave Time Scale: 1 cob = 5 minutes, 2 cobs = 9 minutes add 1 minute for every additional cob

Example: 4 cobs = 11 minutes


Once microwave is finished remove container from microwave, be careful, it could be hot.  Cobs can handle staying in the container for an extra minute or two if you are not ready to plate them yet.  I'd recommend removing the lid, so they do not continue to steam.  Once ready, carefully pull husks back.  You can either remove them completely or for a unique presentation, I braid the pieces together for a rustic look.  The silky threads will usually come off in one big piece (how simple is that).


I will assume you like your corn on the cob with butter and salt :).  An easy way to do this is butter the plate, with a stick of butter and sprinkle with salt (I like Kosher, but you can use your favorite).  Place cobs on plate and roll around.  Apply more butter and sprinkle with salt to your taste.


I hope you enjoy this quick and easy side dish as much as my family.